|
Slot 1 Orb Modification
Product: ThermalTake Slot 1 Orb & Slot 1 Celeron 300A
Street Price: ~$15 for the orb
Date Reviewed: January 12, 2001
Why This Was Done:
First of all, you should know this isn't a hardcore
review of the latest hardware coming out on the market. I just wanted to share a little fun I had modding a Slot 1 Orb
to fit my old Slot 1 Celeron 300A. Yes, I still use this CPU in one of
my machines, not all of us can afford 1Ghz Athlons. The old cooler for
the Celeron was a very poor design
which didn't cool the CPU well, not to mention the fans were completely
shot from old age. The max I could go with the old cooler was 450Mhz @ 2.1v, with the
"Celeron Orb" on it now runs cool to the touch and I can
run it at 482Mhz @ 2.2v. I had the Slot 1 Orb laying around collecting
dust, and since I didn't want to spend any money buying a Celeron cooler
for this ancient CPU, I decided I was going to make them work together.
One rainy afternoon I was trapped in the apartment so I started
gathering up all the components to make this little marvel.
How It Was Done:
The holes for a Celeron are more spread out than a Slot
1 P3, and the Celerons don't have a back-plate like the P3. To overcome
the back-plate problem, I happened to have the extra kit from an Alpha
P3125 that allows you to mount it to a Celeron. (Yeah, like I'm going to
mount a $45 cooler on a $25 CPU.) I had to get some
different screws, nuts, and washers, but I was able to dig those up in
my box of miscellaneous things.
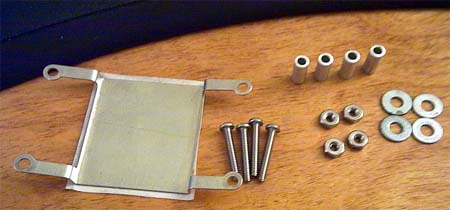
The problem with the holes being spaced out more was nothing
that my Dremel and Makita (cordless drill) couldn't fix. First I cut off the old
P3 alignment pins that were embedded in the orb,
then I placed the Celeron on the orb to mark the new holes to be drilled, making
sure it was all level and perpendicular.
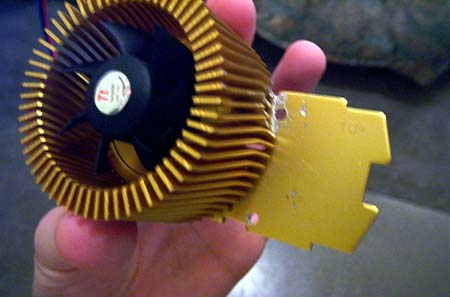
I had to take a chunk out of the Orb near the top holes so the
screws would fit through, easily done with the Dremel's cutting disc. The
bottom holes had plenty of clearance though. However after I test fitted the
Celeron with the orb, it wasn't making full contact to the core! Yes, I know I used way too
much thermal compound, but I did that to test the contact between the core &
orb.
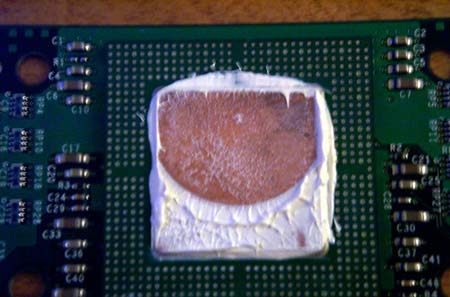
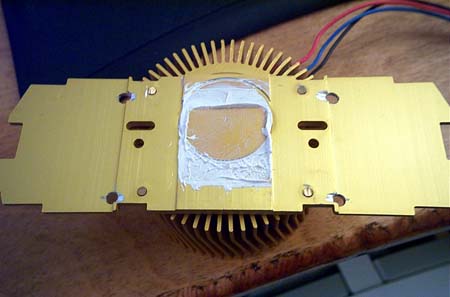
Since the Orb was intended for a Coppermine P3 and not the
massive core of a Celeron, only one thing could be done, and it involves
sandpaper... Time to lap the orb flat!
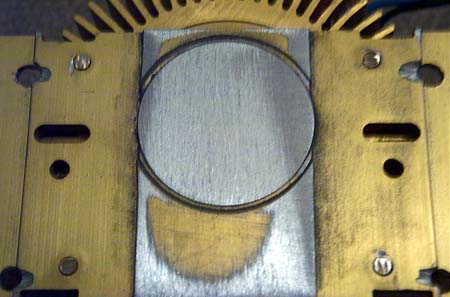
This is after some sanding, you can see how high up the round
area was compared to the rest of the middle section.
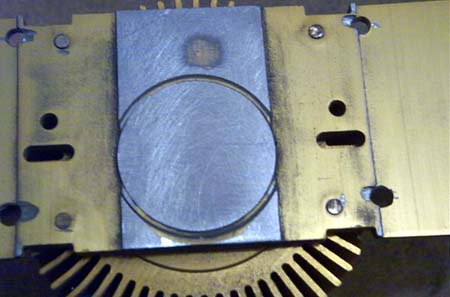
Almost there, this sucker was nowhere near flat to begin
with....
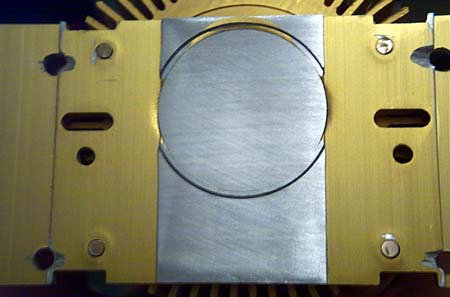
I think that's about on the money. No need to go up to the
2,000+ grits, I think the highest I use is like 600-800. Now that we have a flat surface where the Celeron
core sits, it's time to slap some more thermal compound on there and see if we get
better contact than before all this hard work...
On To Page 2 To See How It
Works...
|


 eWeek is the essential technology information source for builders of e-business. Focuses on e-commerce, communications and Internet-based architecture.
 Oracle Magazine contains technology-strategy articles, sample code, tips, Oracle and partner news, how-to articles for developers and DBAs, and more.
 Dr. Dobb's Journal enables programmers to write the most efficient and sophisticated programs and help in daily programming quandaries.
 InformationWeek is the only newsweekly you'll need to stay on top of the latest developments in information technology.